Only superusers can work with location data in Isora GRC.
Note: Locations are an optional feature you can use to track the location of physical inventory. You may already be tracking this information using another tool besides Isora GRC.
Using the New UI
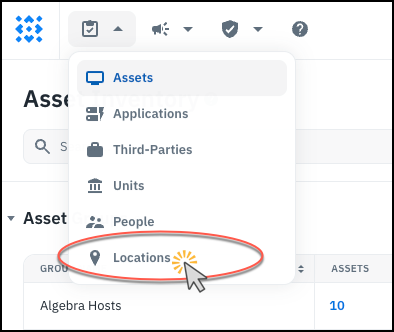
- On the Inventory menu, click Locations.
-
To add multiple locations, click the Import button and upload a CSV.
See also: Reference: Locations Reference: CSV Upload

-
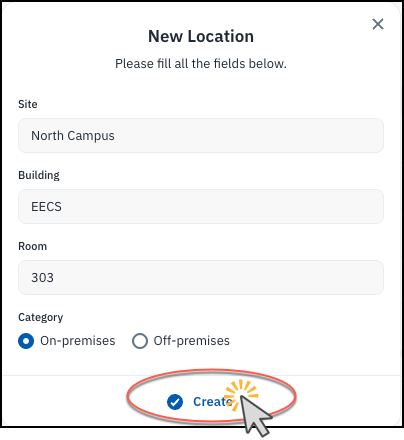
To add a single location, click the + button instead. Then fill out the fields and click Create.
-
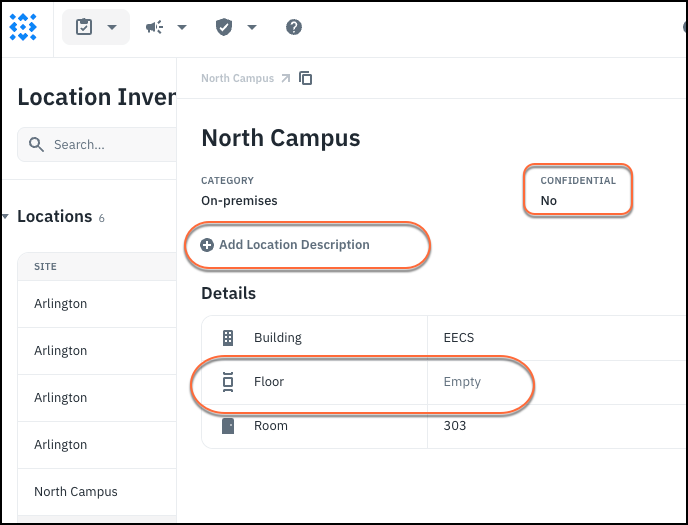
After creating the location object, you can update the other fields (Confidential, Description, and Floor).
- Users will be able to reference these locations when entering location data on an asset.
Using the Old UI
- Go to the Settings page and find Locations, under Organization.

- Use the upload button to upload a CSV of multiple locations.

See also: Reference: Locations Reference: CSV Upload
- Alternatively, use the + sign to add a single location.

- Fill out the fields and click Save. The combination of Site, Building, Floor and Room must be unique.

- Later on, when you add inventory, the location information provided will be validated against locations which are specified here. Although the use of locations is optional, Isora GRC won’t add hosts to its database with invalid or incomplete location information (in other words, you can leave location fields blank on a host, or you can fill them in completely with valid location specifiers).
See also: