You must be a superuser to perform this tutorial.
In this tutorial, you will create a new Risk Register custom field and note how it affects risk register entries. Then you can optionally undo your changes at the end.
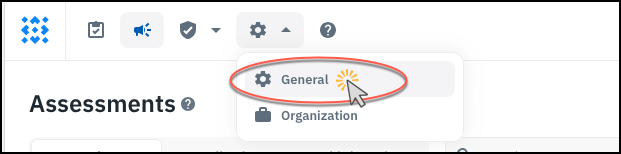
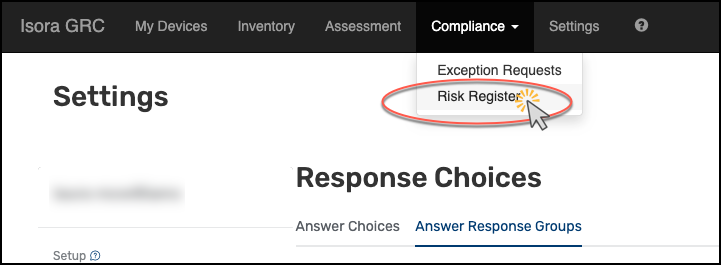
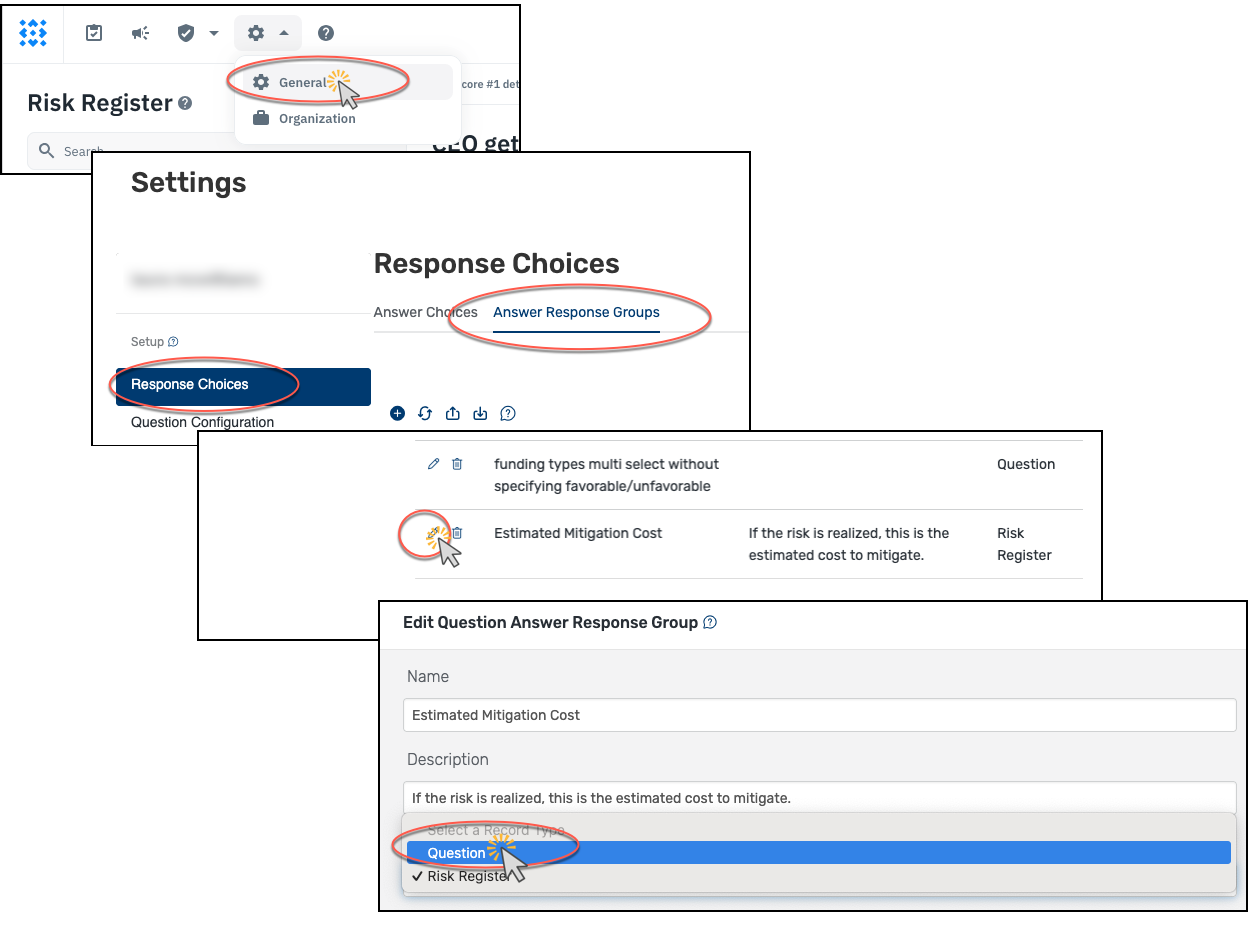
- Logged in as a superuser to Isora GRC, go to Settings→ General.
-
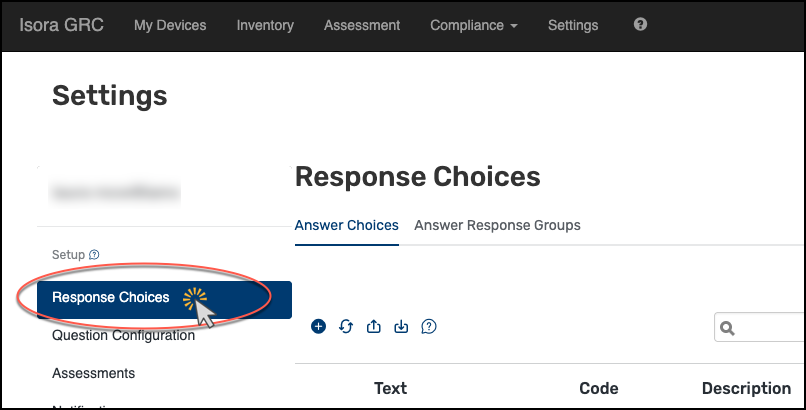
On the left-hand navigation panel (you’re in the old UI now), click Response Choices.
-
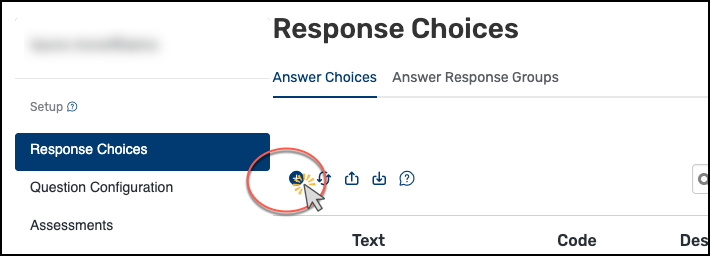
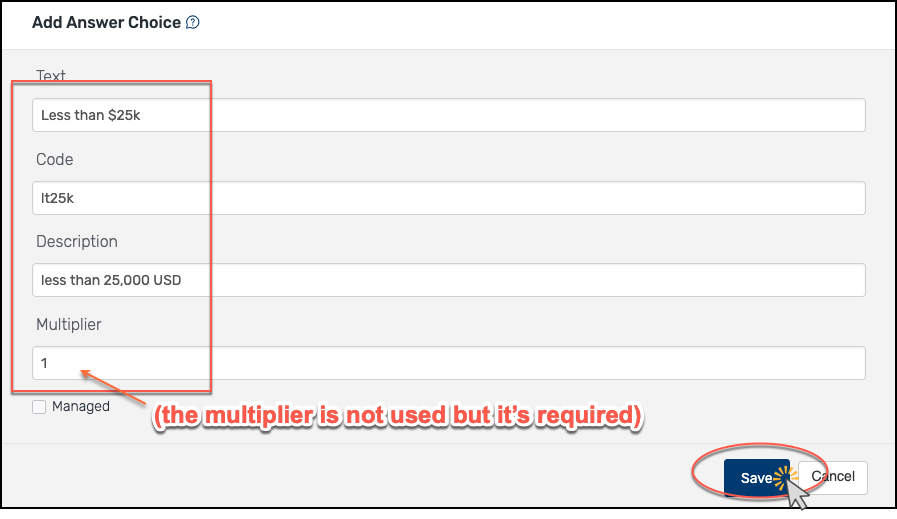
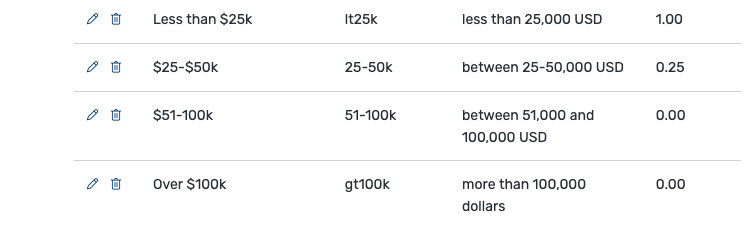
In the Answer Choices tab, click the + sign to create a new answer choice.
-
Fill in the fields as shown in the screenshot and click Save.
-
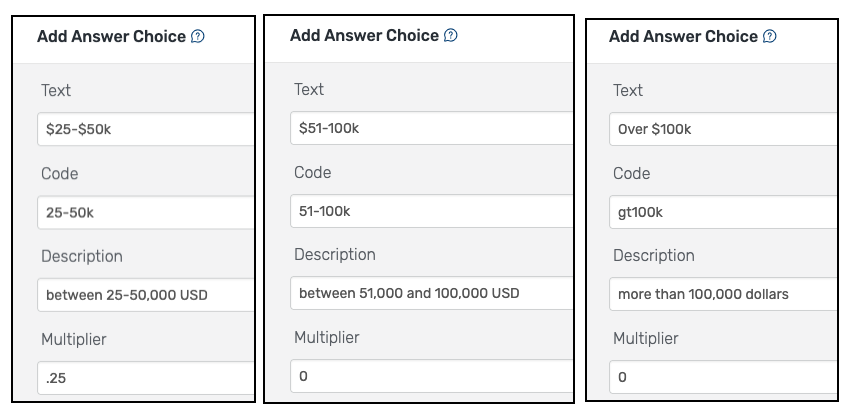
Follow the same process to add two additional answer choices, as shown.
-
Your new answer choices will show up at the bottom of the table.

-
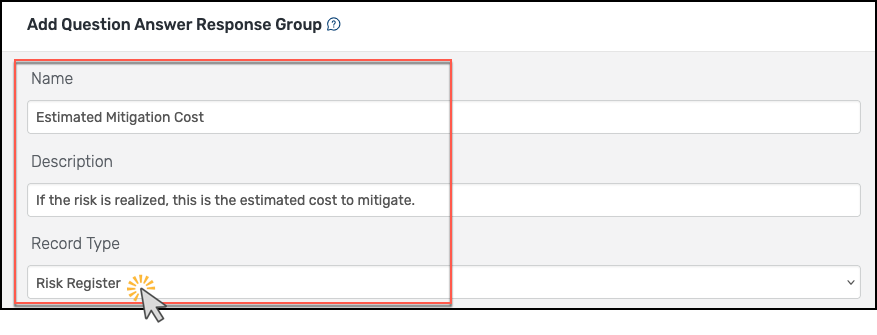
Next, go to the Answer Response Groups tab and click the + sign to create a new one.

-
Fill in the Name and Description fields. Choose “Risk Register” for the Record Type.
-
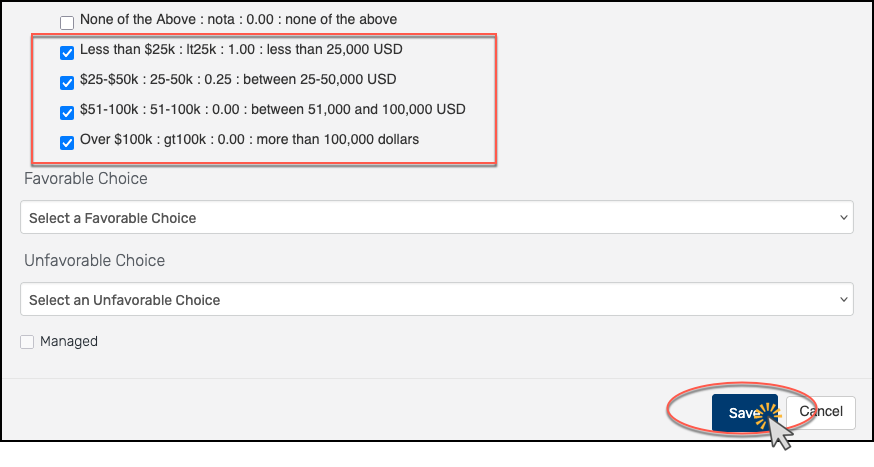
From the list of existing answer choices, choose the ones you just created (they will be down at the bottom). Ignore the Favorable and Unfavorable Choice options and click Save to create the new answer response group.
-
You can see the new answer response group at the bottom of the table.

-
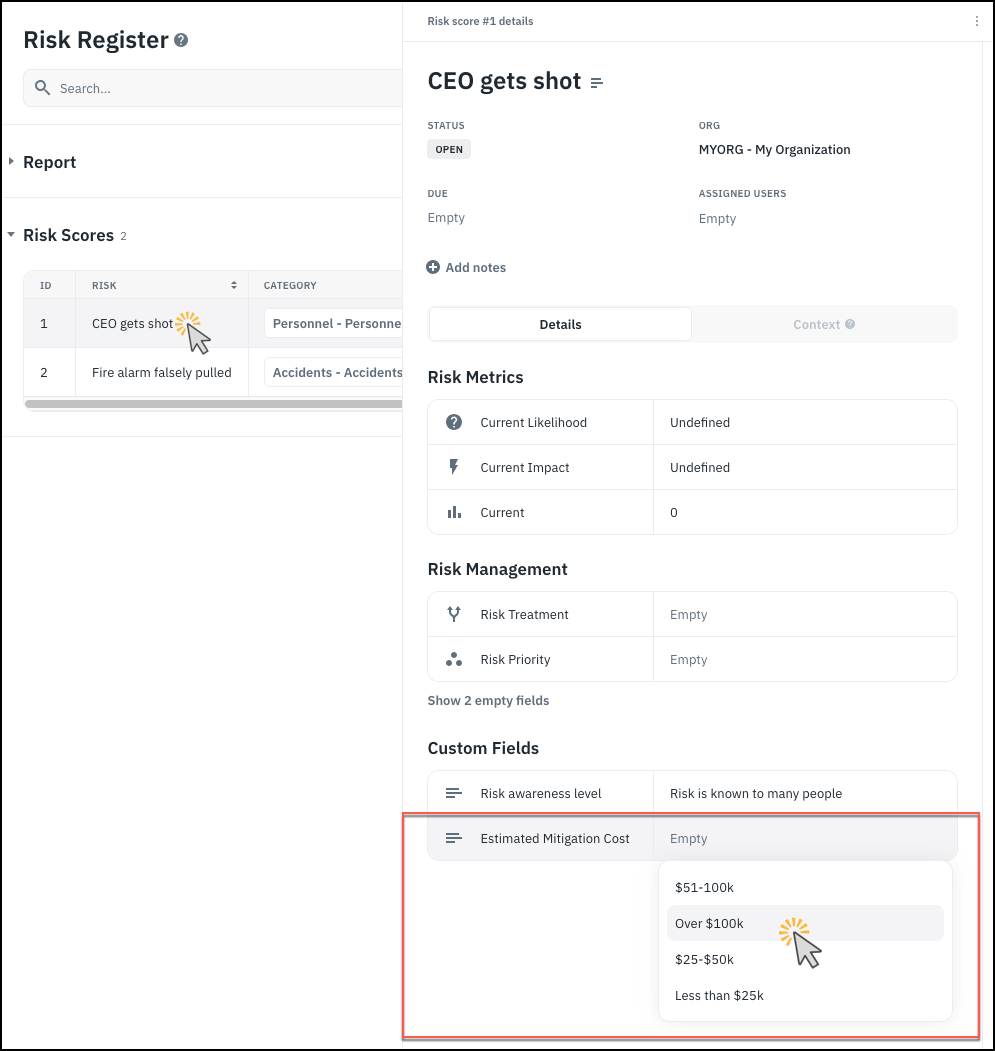
Go back to the Risk Register to see how the new field shows up.
-
Clicking on a risk register entry, you can now see the new custom field showing up at the bottom. Initially, the value is empty but you can choose from your selected answer choices to fill it in.

-
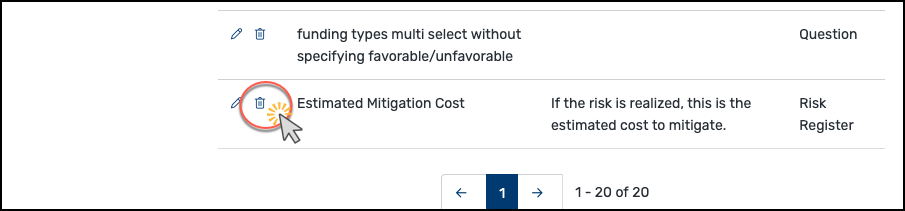
To remove the new custom field from risk register entries, you can go back to the Answer Response Groups area and edit the answer response group to change it to a Question record type (don’t forget to click Save).
-
Or you can delete it.
-
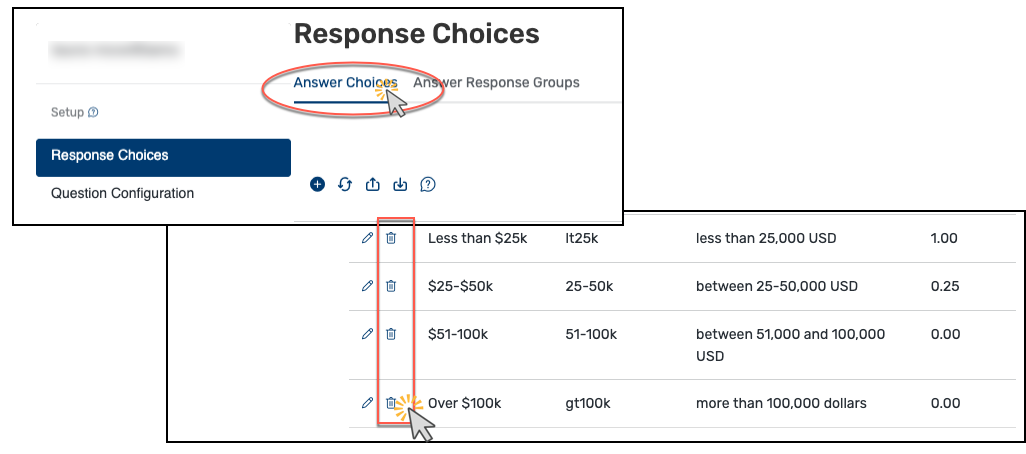
You can also go through one at a time and delete the answer choices that you created.

- Logged in as a superuser to Isora GRC, go to Settings→ General.
-
On the left-hand navigation panel (you’re in the old UI now), click Response Choices.
-
In the Answer Choices tab, click the + sign to create a new answer choice.
-
Fill in the fields as shown in the screenshot and click Save.
-
Follow the same process to add two additional answer choices, as shown.
-
Your new answer choices will show up at the bottom of the table.
-
Next, go to the Answer Response Groups tab and click the + sign to create a new one.
-
Fill in the Name and Description fields. Choose “Risk Register” for the Record Type.
-
From the list of existing answer choices, choose the ones you just created (they will be down at the bottom). Ignore the Favorable and Unfavorable Choice options and click Save to create the new answer response group.

-
You can see the new answer response group at the bottom of the table.

-
Go back to the Risk Register to see how the new field shows up.
-
Clicking on a risk register entry, you can now see the new custom field showing up at the bottom. Initially, the value is empty but you can choose from your selected answer choices to fill it in.
-
To remove the new custom field from risk register entries, you can go back to the Answer Response Groups area and edit the answer response group to change it to a Question record type (don’t forget to click Save).

-
Or you can delete it.
-
You can also go through one at a time and delete the answer choices that you created.